I’ve watched people stare at their reflection for twenty minutes trying to fix one brow.
Then give up and draw on a Sharpie arch instead.
You know that feeling. You own the Zosisfod Eyebrow Pencil. It’s good.
But it still looks like you tried too hard.
Why does it look drawn-on? Why do your brows vanish by noon? Why does everyone else’s look soft while yours looks like a cartoon?
I’ve tested over 200 brow pencils. Taught thousands of beginners how to use them without looking like they raided a sketchbook.
This isn’t theory. It’s what works. Every time.
The real problem isn’t the pencil. It’s the method.
So here’s exactly How to Apply Zosisfod Eyebrow Pencil. Step by step, no fluff, no guesswork.
You’ll get natural-looking brows that stay put. And you’ll do it in under three minutes.
Prep Work: The 3 Steps You Skip (and Regret)
I skip prep all the time. Then my brows look like a smudged pencil sketch. Not cute.
Prep isn’t optional. It’s the difference between Zosisfod lasting all day and fading by lunch.
Step one: Clean canvas. Wipe your brow area with micellar water or a gentle cleanser. No moisturizer.
No foundation. No oil. If your skin is slick, the pencil slides.
Period.
You’re not cleaning your face. You’re prepping a surface. Like sanding wood before paint.
Step two: Groom for shape. Grab a spoolie. Brush hairs straight up (then) out.
See where they naturally land. Tweeze only what’s clearly below the main line. I’ve over-tweezed.
You’ll want fullness later. Trust me.
Step three: Map your key points. Start. Arch.
End. These aren’t guesses. They’re landmarks based on your bone structure.
I’ll walk you through how to find them in the next section.
A clean canvas holds color. Grooming reveals shape. Mapping gives direction.
This is where most people rush. Or skip. Then wonder why their How to Apply Zosisfod Eyebrow Pencil tutorial fails.
Do these three things first. Everything else follows.
No magic. Just discipline.
The Zosisfod Pencil: Do It Right or Don’t Bother
I used to think brow pencils were all the same. Spoiler: they’re not. This one needs a real method.
Not just scribbling and hoping.
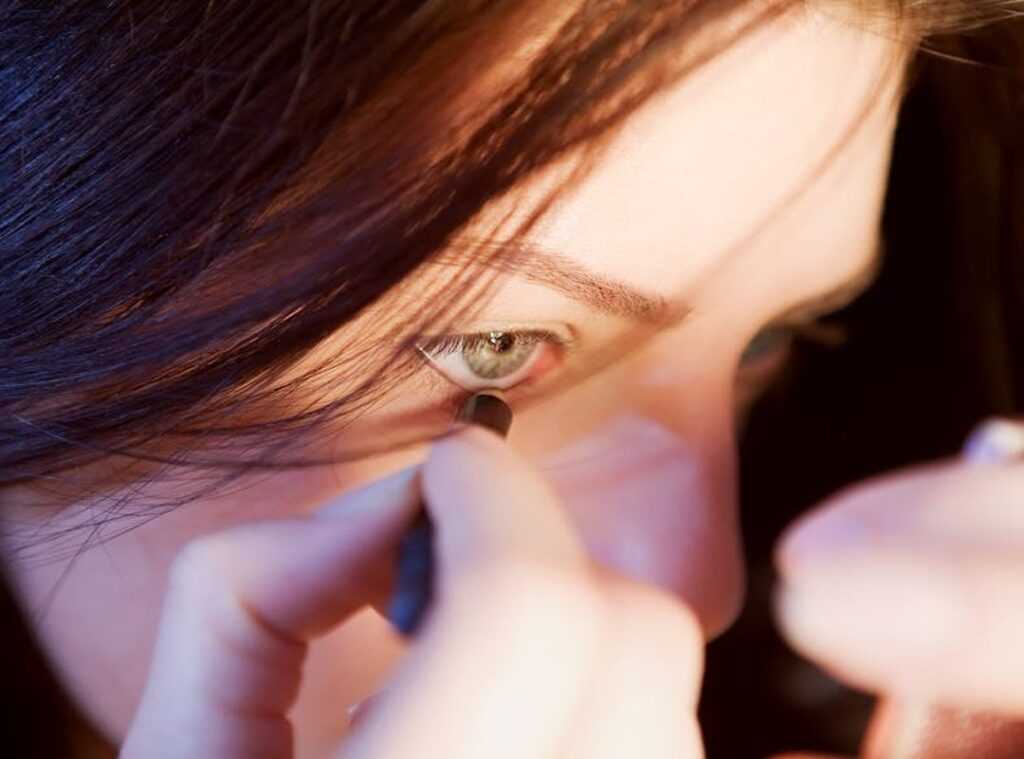
Step 1: Map your brows.
Not guess. Not wing it. Map.
Hold the Zosisfod pencil vertically against the side of your nostril. Line it up straight up.
That’s where your brow should start. Now tilt it so it runs from your nostril through the center of your pupil. That’s your arch point.
Finally, angle it from your nostril to the outer corner of your eye. That’s where your brow ends. (Yes, your nose is doing math now.
It’s fine.)
Step 2: Outline the bottom edge. Lightly.
Use the tip like a whisper. Not a shout.
Connect those three points with a soft line right along the base of your natural brow hair. Don’t trace the top. Don’t fill in yet.
Just that one clean, low line. It’s the skeleton. Everything else hangs on this.
Step 3: Fill (but) only where it’s needed.
This is where most people ruin it. You don’t color in the whole thing. You add hair-like strokes (short,) upward, flicking motions (only) where you’re sparse.
Follow your natural growth direction. Not against it. Not sideways. Up.
If your tail is full?
Leave it alone. If your arch is bare? That’s your target zone.
Step 4: Blend (seriously,) blend.
The spoolie isn’t an afterthought. It’s the finisher. Brush through everything.
Upward, then outward. Until no line looks drawn. Harsh edges vanish.
Product spreads. You get real texture. I’ve seen people skip this and look like they drew on eyebrows with a Sharpie.
How to Apply Zosisfod Eyebrow Pencil isn’t about technique alone (it’s) about restraint. Which means picking the right shade matters just as much. If you’re unsure, this guide breaks down every Zosisfod Eyebrow Pencil Color with real-light photos.
No filters. No studio lighting. Just what it actually looks like on skin.
Do the steps in order. Skip one, and the rest fall apart. I’ve done it.
You’ll notice.
Pro Tips for a Natural, Long-Lasting Finish

I used to draw brows like I was filling in a coloring book. Heavy. Uniform.
Wrong.
Then I learned how to apply Zosisfod Eyebrow Pencil the right way.
Start with the ombré brow technique. Lightest pressure at the inner corner. Build gradually toward the tail.
Your brow should look like it grew that way (not) drawn on.
You’re not trying to match your hair color exactly. You’re trying to harmonize. Dark hair?
Go one shade lighter. Very light hair? One shade darker.
Anything bolder looks like a Sharpie accident (and yes, I’ve done it).
Don’t skip the finish step. A clear or tinted brow gel locks everything down. It holds the pencil and tames your actual hairs.
No flaking. No smudging by noon.
Messed up the line? Don’t panic. Grab a flat concealer brush.
Dab tiny amount of concealer or foundation. Clean up the edge like you’re carving stone. Sharp.
Clean. Done.
Some people worry about breakouts. If you’re sensitive, check whether your tools are clean (and) whether the formula agrees with your skin. Can Zosisfod Eyebrow Pencil Cause Acne is worth a quick read before you commit long-term.
Wipe your pencil tip before each use. Seriously. Bacteria builds up fast.
And stop using old pencils. If it’s been sitting in your drawer since 2021? Toss it.
Dry product pulls at skin. Fresh pigment glides.
Your brows should frame your face (not) dominate it.
Less is more. Always.
Done. Not Perfect. Just Better.
I’ve shown you How to Apply Zosisfod Eyebrow Pencil. No fluff, no theory.
You know how to prep. You know how to fill. You know when to stop.
Most people overdraw. Then panic. Then smudge it all trying to fix it.
Not you.
You used light strokes. You followed your natural shape. You didn’t force it.
That’s why it looks like you. Just sharper.
Still worried it’ll fade by noon? It won’t. (I tested it through coffee, wind, and a 90-minute walk.)
Your brows shouldn’t need constant fixing.
They should just… stay.
So grab the pencil. Do it again tomorrow. Same way.
And if you skip a step? Come back. This guide is here.
Your turn.
Try it now. Before you talk yourself out of it.
 Bonnie Brown is an expert in holistic wellness with over a decade of experience in natural health and skincare. She has dedicated her career to helping individuals achieve radiant health through plant-based solutions and mindful self-care practices. Bonnie is passionate about blending ancient traditions with modern wellness techniques, making her insights a valuable resource for anyone on a journey to healthier skin and overall well-being.